Losing a small amount of water every day is completely normal for any pool. Evaporation, splash-out from swimming, backwashing the filter and water carried out on swimmers’ bodies all contribute to gradual water loss. But if your pool level is dropping more than 2 to 5 cm per week and you have not had an unusually hot or windy stretch of weather, you may have a leak.
Is your pool losing more than 5 mm of water per day in calm, cool weather? You probably have a leak. The bucket test confirms it within 24 hours. An untreated leak costs hundreds of euros per year in water and chemicals, and can eventually damage your pool’s foundation or surrounding paving. This guide walks you through the process systematically: from confirming there is actually a leak, to locating it, to deciding whether to repair it yourself or call a professional.
Tip
Probably a leak if:
- You’re losing more than 5 mm per day in cool, calm weather
- Water level drops faster than normal, even without swimmers
- You see wet spots around the pump, skimmer or plumbing
Probably evaporation if:
- Water loss is 3-5 mm per day in hot, sunny weather
- Water loss decreases on cloudy days
- No wet spots around the equipment
Run the bucket test (see below) to know for sure.
Understanding how a pool’s plumbing and circulation system works helps you narrow down the most likely leak locations quickly. Regular maintenance using our pool cleaning guide also surfaces early signs of leaks before they become serious.
Normal water loss versus a real leak
Before investigating a leak, it helps to understand what normal water loss looks like. Many pool owners start worrying about a leak when the real cause is simply evaporation in hot weather.
Evaporation rate depends on air temperature, water temperature, humidity, wind speed and whether you use a cover. On a hot, dry, windy day, an uncovered pool can lose 5 mm or more per day. With a solar or safety cover, evaporation drops to almost zero.
| Conditions | Expected daily water loss |
|---|---|
| Cool, calm day with pool cover | 0 to 1 mm |
| Mild day, no cover | 2 to 3 mm |
| Hot and sunny day, no cover | 3 to 5 mm |
| Hot, sunny and windy, no cover | 5 to 8 mm |
| Very hot day with lots of swimming | 8 to 15 mm including splash-out |
For a standard 4x8 metre pool (32 m2 surface area), 5 mm of evaporation equals 160 litres of water per day. That is substantial and entirely normal without a cover.
Rain adds water back. Backwashing your filter removes 200 to 500 litres in one session. Keep these factors in mind when assessing your water level changes over a week.
A genuine leak concern arises when water loss consistently exceeds what evaporation and splash-out can explain, or when you are losing water with a cover on - because a covered pool should lose almost nothing to evaporation.
The bucket test: confirming a leak
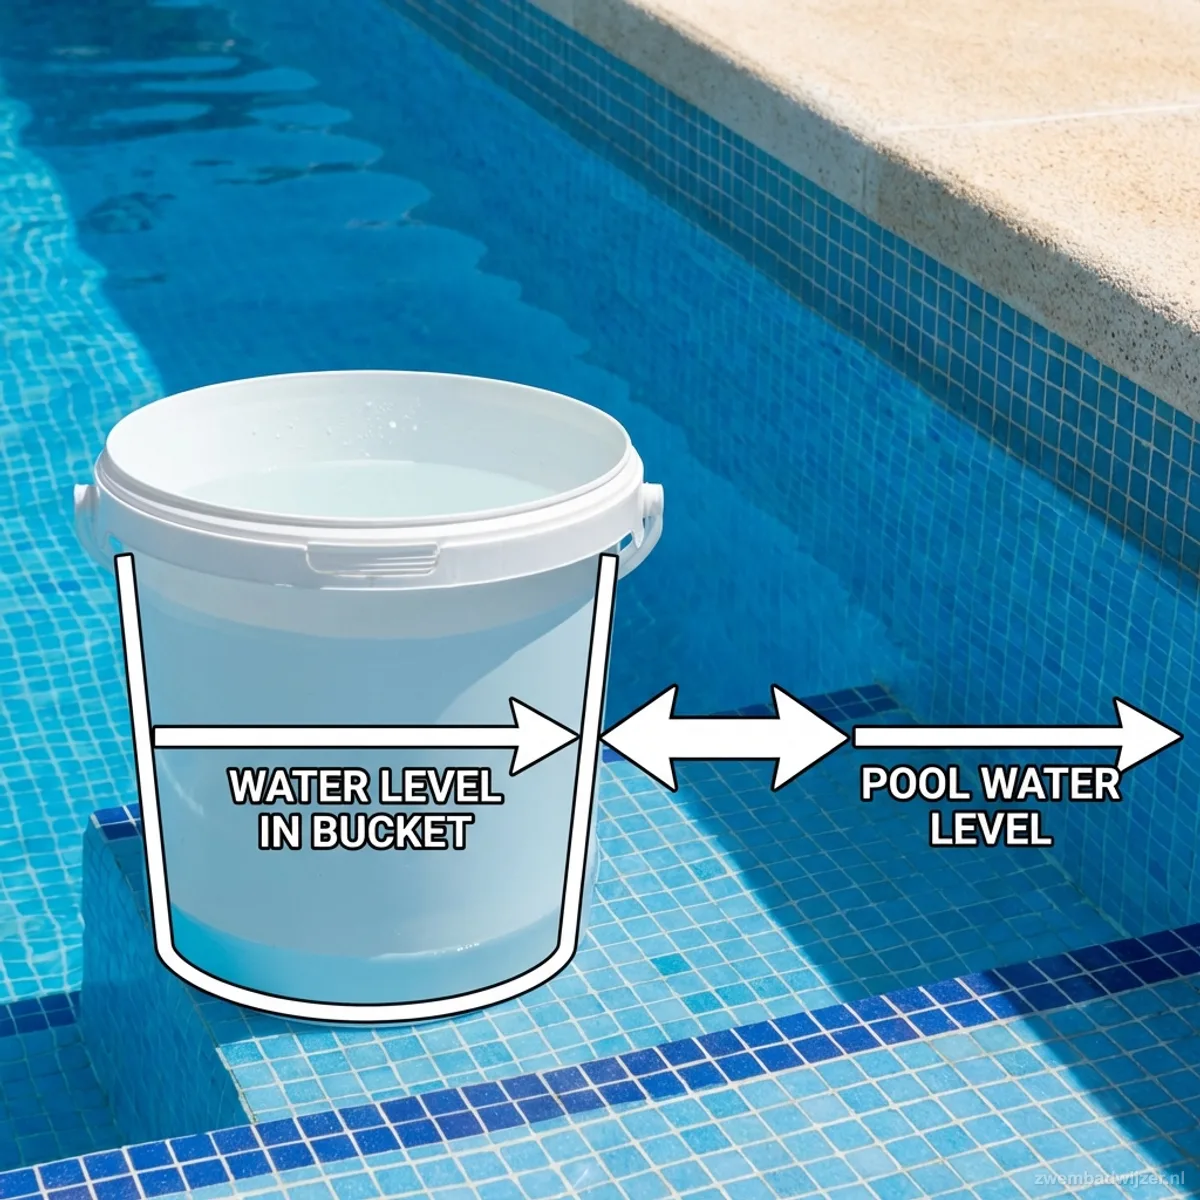
The bucket test is the standard first step for any suspected pool leak. It separates real leaks from normal evaporation with a simple comparison that any pool owner can do.
What you need: A standard 10 to 15-litre bucket, a waterproof marker or tape, and 24 to 48 hours of patience.
Step 1: Fill the bucket with pool water to about 2 cm below the rim. This prevents spillage from any waves or movement.
Step 2: Use the marker to mark the inside water level clearly. Then mark the outside of the bucket at the current pool water level - or tape a small piece of tape to the pool wall at the exact current waterline.
Step 3: Place the bucket on a pool step so it is partially submerged. This is important: the bucket must be in the pool water so it experiences the same temperature as the pool. If the bucket sits outside the pool in a different temperature, evaporation rates will differ and the comparison will be invalid.
Step 4: Do not use the pool for 24 to 48 hours. Do not add water. Let evaporation and any potential leak do their work.
Step 5: After 24 to 48 hours, compare the two drops. Measure how much the pool level dropped below your outside mark, and how much the bucket water dropped below your inside mark.
- If both dropped by roughly the same amount, the water loss is evaporation - no leak.
- If the pool dropped more than the bucket, you have a leak.
The size of the difference gives you a clue about severity. A 5 mm difference over 24 hours is a small but real leak. A 30 mm difference is a significant leak that warrants immediate investigation.
Tip
Run the bucket test once with the pump running normally, then again with the pump switched off and the system in static mode. If the pool loses more water with the pump running, the leak is likely in the plumbing or fittings under pressure. If it loses more water with the pump off, the leak is probably in the shell or liner. This narrows your search area significantly before you start looking.
Where pool leaks commonly occur
Knowing the most likely leak locations saves significant time during your investigation. These are the spots to check first.
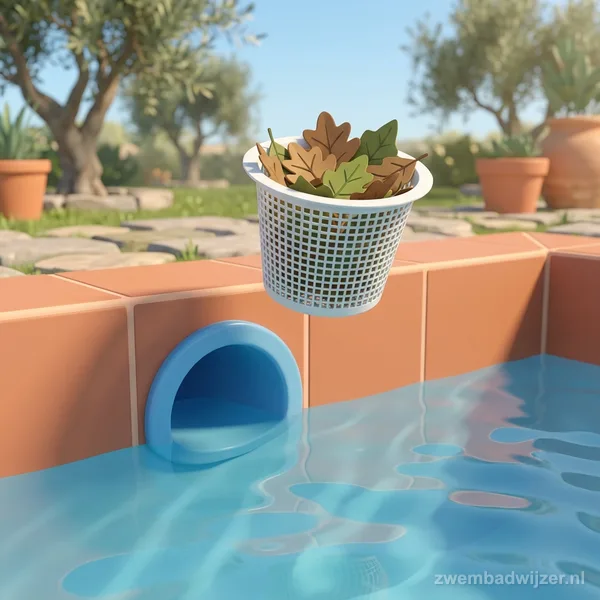
Skimmer face plate and gasket. The skimmer is mounted through the pool wall, and the gasket between the skimmer body and the pool shell degrades over time. This is the single most common location for leaks in both liner and concrete pools. The leak may appear as a crack in the skimmer throat, a failing gasket, or a separation between the skimmer face plate and the wall.
Return line fittings. The fittings where the return lines enter the pool wall are under pressure when the pump is running. The O-rings and gaskets in these fittings harden and crack over time, particularly in pools that have been through many seasonal temperature cycles. Check every return fitting for dampness, staining or visible gap around the fitting.
Main drain. The main drain at the bottom of the pool connects to the circulation system via underground plumbing. The drain cover gasket can fail, or the pipe connecting to it can crack or joint-separate over time. Main drain leaks are among the most difficult to confirm and repair.
Light fixture conduit. Inground pools with underwater lights have a conduit running through the pool wall to the light fixture. Water can track along this conduit and exit at the equipment pad, making it look like a plumbing leak when the source is actually the light niche. Check for water staining around the conduit entry point inside the light niche.
Shell cracks - concrete and gunite pools. Concrete pools develop hairline cracks over time as the shell settles, expands and contracts with temperature changes. Structural cracks caused by ground movement or inadequate construction are more serious. Hairline cracks under 3 mm wide can often be repaired with underwater epoxy. Wider or actively growing cracks need professional assessment.
Liner tears - vinyl liner pools. The vinyl liner is the primary water barrier in most above-ground pools and many inground pools. Tears develop from sharp objects, UV degradation at the waterline, improper installation tension, or age. Small tears are often nearly invisible when submerged but can leak significantly. Dye testing is the most reliable way to find them.
Pump, filter and valve fittings. Above-ground plumbing connections at the equipment pad - where the pump, filter and valves connect to the pool via flexible hoses or rigid pipe - can leak at any union, O-ring or threaded fitting. These leaks are usually visible as drips or puddles around the equipment, or as wet ground under and around the pad.
Visual inspection checklist
Work through this checklist before reaching for the dye or calling a professional. Many leaks can be found with nothing more than careful observation.
- Walk the pool perimeter and look for wet ground, soft ground, or areas where grass is noticeably greener, which can indicate subsurface water from a buried pipe.
- Check every visible fitting in the pool wall - skimmer, returns, vacuum point, light niches - for cracks, gaps, staining or surface degradation around the fitting.
- Check the skimmer throat and face plate carefully. Push gently on the face plate to see if it flexes away from the wall, which would confirm a failing gasket.
- Inspect the waterline of a concrete or tiled pool for cracks at the tile grout line. A crack that follows the grout line around the pool often indicates a settlement crack that has opened at the weakest point.
- Examine the liner waterline in a liner pool for any discolouration, wrinkling or separation from the coping. Tears often start at the waterline where UV exposure is greatest.
- Check the equipment pad carefully. Look for drips from any hose clamp, union fitting or valve body. Feel along flexible hoses for damp patches.
- Check the ground around underground return lines if they are accessible. If the ground is consistently wet in a location that cannot be explained by surface water, it suggests a subsurface pipe leak.
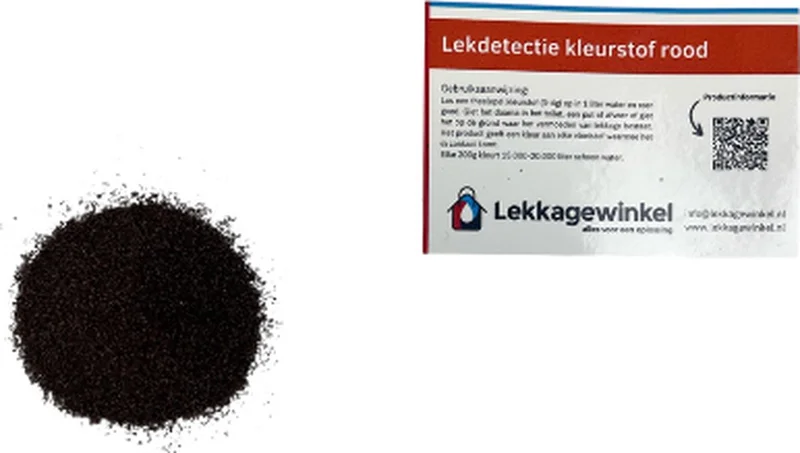
Using dye to confirm a location: Once you have a suspected area, use a pool leak detection dye. This is a coloured liquid that you squirt near a suspected leak point with the pump off and the water still. If there is a leak, the dye will be drawn into it as a visible stream. Apply dye near fittings, cracks, gaskets and any other suspect point. Work methodically from one end of the pool to the other.
DIY repairs
Several common pool leaks are straightforward to fix yourself with the right materials.
Liner patch kit for vinyl liner tears. Underwater vinyl patch kits consist of a flexible PVC patch material and a waterproof adhesive designed to bond under water. Clean the area around the tear, cut the patch to size with rounded corners (sharp corners peel), apply the adhesive generously to the patch, fold it in half, submerge it, and press it firmly over the tear. Hold it in place for 60 seconds. Most patches are fully cured within a few hours.
Underwater epoxy for concrete cracks. Two-part underwater epoxy can be used on cracks up to approximately 3 mm wide. Clean the crack surface, mix the epoxy as directed, and press it firmly into and over the crack. Underwater epoxies are designed to displace water during application and cure in contact with water. For cracks wider than 3 mm or cracks that are actively growing, epoxy is a temporary measure at best - professional assessment is needed.
Skimmer gasket replacement. This is a more involved but very achievable DIY repair. The pool level needs to be lowered below the skimmer opening. Remove the skimmer face plate screws, pull the face plate away from the wall, and peel off the old gasket. Clean both surfaces thoroughly. Apply pool putty or a new rubber gasket (depending on your skimmer model) and reassemble the face plate with new screws. Allow the sealant to cure fully before refilling.
Tip
Pressurising underground pool pipes to locate leaks is a standard professional technique, but it requires calibrated pressure gauges, isolation valves and knowledge of pipe specifications. Attempting to pressure-test plumbing without proper equipment can rupture pipe joints and cause far more expensive damage than the original leak. Leave pressure testing to a professional.
When to call a professional
Some leak situations are beyond the scope of DIY investigation and repair.
Call a professional if the bucket test confirms a leak but visual inspection finds nothing. If you have checked every accessible fitting, gasket and surface and found no visible leak point, the leak is likely underground or in a location you cannot access without equipment. Professional leak detection uses pressure testing, acoustic detection and sometimes underwater cameras to find concealed leaks.
Call a professional for any suspected main drain or underground pipe leak. These require excavation or specialist pressure and listening equipment. Attempting to investigate them without proper tools is rarely productive and can disturb surrounding ground unnecessarily.
Call a professional for structural cracks in a concrete shell. Cracks wider than 3 mm, cracks that run through the full shell thickness, or cracks that reappear after DIY repair suggest structural movement or construction issues. A structural engineer or specialist pool repair contractor should assess these before repair to ensure the underlying cause is understood.
Call a professional if water loss is rapid. Losing more than 5 cm per day consistently after accounting for evaporation and splash-out suggests a significant leak that could undermine the pool structure or surrounding ground if left unchecked. Do not delay.
Common mistakes when checking for leaks
Many pool owners waste time and money by making one of these mistakes:
- Running the bucket test in unstable weather. Rain, strong wind or temperature swings distort the result. Choose a stable period of at least 24 hours.
- Forgetting to disable the auto-fill. If you have a float valve or automatic top-up system, it masks the water loss completely. Always disable it before the bucket test.
- Calling a professional too soon. First check the skimmer gaskets, return fittings and pump connections yourself. Many leaks are simple O-ring problems you can fix in 15 minutes.
- Only testing with the pump on. Always run the bucket test twice: pump on and pump off. The difference tells you whether the leak is in the plumbing or in the shell.
What does it cost if you do nothing?
A small leak losing 1 cm of water per day in a 8 x 4 metre pool means about 320 litres per day. That is nearly 10,000 litres per month, plus the chemicals to bring that fresh water back to the correct pH level and chlorine level . On an annual basis, you are looking at EUR 200 to EUR 500 in extra costs. Early detection saves real money.
Recommended products

Intex Vinyl Patch Repair Kit
IntexSelf-adhesive repair patches for tears and punctures in Intex and Bestway vinyl pool liners. Works underwater, no separate glue needed.
- Works underwater without draining
- Flexible patches for vinyl and PVC
- Fast-curing adhesive
- Covers multiple small repairs
- Patches are visible up close
- Large tears need professional repair